What was once our makeshift ‘bedroom’ (mattress on floor, retro TV on random side table, sheets and closet doors as window coverings) has now been given a new life. An old beige on beige on beige dwelling is now bright, airy and inspiring. Sprinkled with hand-selected accents, surprising souvenirs from some of our favorite days (and people) plus photos that captured moments that we get to re-live each time we decide to take a gander.
-

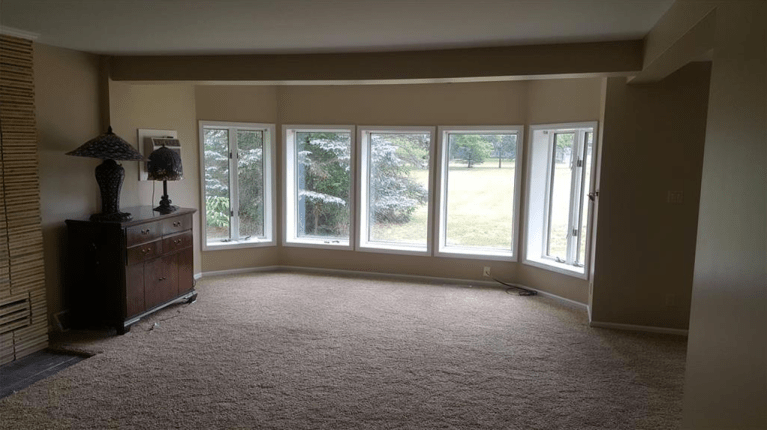
DURING

When we were able to move into our bedroom, one of the first living room updates we did were window coverings (for obvious reasons). We went with honeycomb blinds from Ikea. They let in a great amount of light but offer privacy at nighttime. They don’t obstruct the view when we’re not using them, which was important to us since we loved the picturesque bay windows.
I was torn trying to pick out a color to paint the walls. In my mind I wanted a grey-blue that was so light it was ALMOST white. I tried many samples and none were able to do the trick. I finally had an ah-ha moment to use the same color white (with blue undertones) as the bedrooms. I presented my idea to Rob as one that might take him by surprise with how OUTRAGEOUS it might seem (insert sarcasm). He giggled and responded that it was the best idea about the living room paint I’ve had yet. I wanted a color that was bright and opened up the space. The original trim color is a different shade of white, which brings out the blue undertones on the walls that much more.


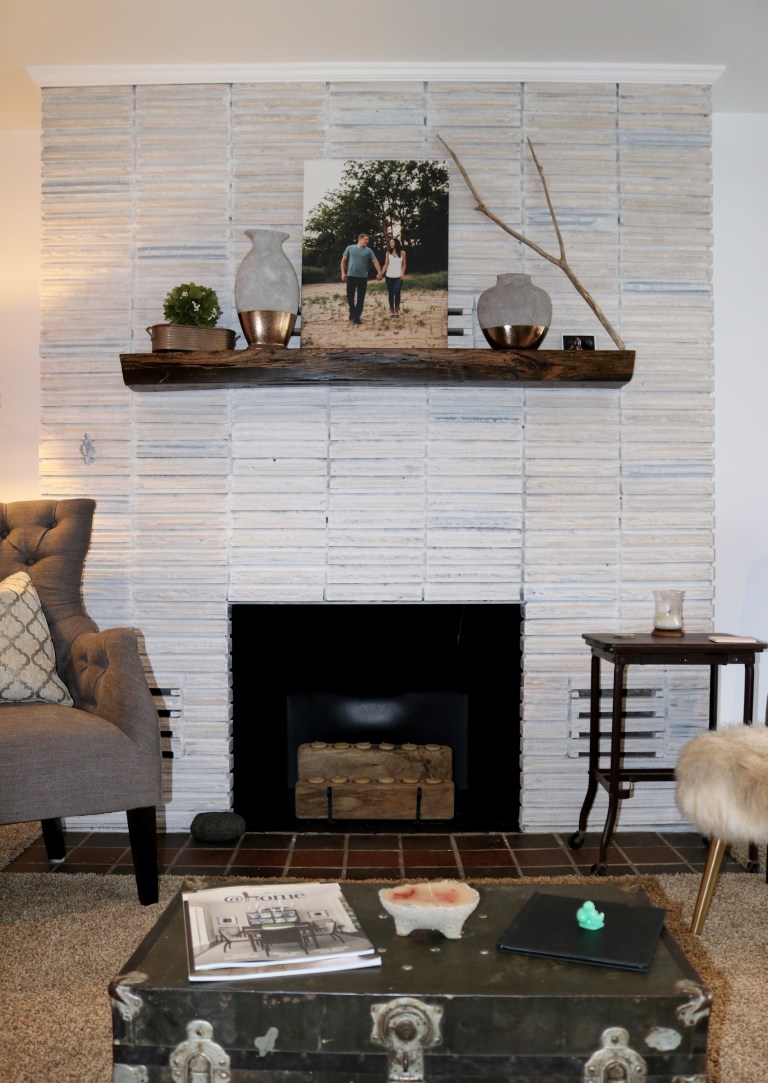
Recently, I decided to move forward with white washing the fireplace. Believe it or not, it was once on the top of the to-do list when we first closed on the house. After many discussions back then, we decided to leave it as is. While Pinterest-ing late one night I landed on before and after photos of white washed fireplaces. I was immediately taken back to the burning desire to do it to ours. Finally, I took the plunge.

-
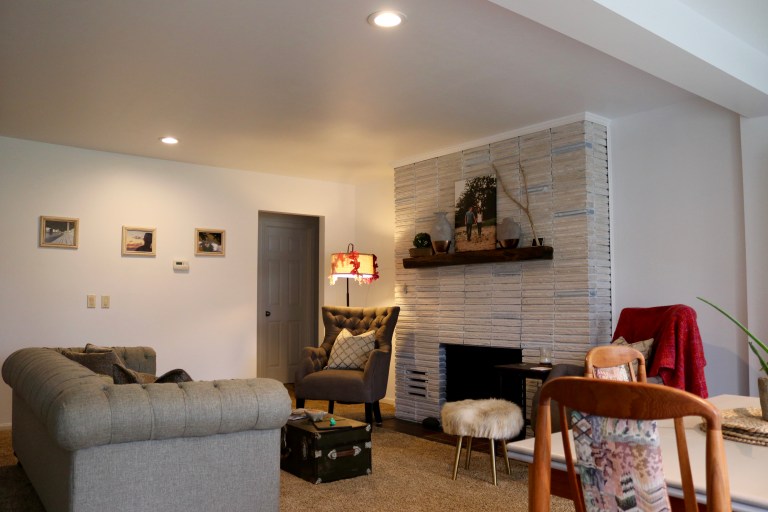
AFTER
First, I repainted the inside of the fireplace with Rustoleum’s high heat paint, which makes the inside look new again. Before the white wash, I wanted to add a few random bricks of different color, so I used the black high-temp paint on a few odd bricks to add some gray into the white wash.
I added water to my white paint to make equal parts water and paint, for a thinner consistency. I applied the paint/water mixture directly to the brick (using a toothbrush for the mortar). I let it sit on the brick for about five minutes before I would go back to the half-dried section of brick with a rag to blend it into the surface and fade the color even more.

I love using pieces that have significance to us, they offer another layer of meaning and we get to enjoy what we surround ourselves with even more.
I had my eye on a larger (and more expensive) antique trunk at my favorite local antique store, but I wasn’t completely sold on it. I continued searching until I came upon this beautiful antique locker.

It was once used by a member of the U.S. CCC (Citizen Conservation Corp) or “Roosevelt’s Tree Army” which began in the 1930s to renew forests impacted by deforestation. Men that worked in this “Tree Army” were sent to camps to plant trees and were given these lockers to store their belongings in. A man that helped plant the pine trees lining the roads on the way up to Traverse City used this locker. Anyone who has traveled to Traverse City enough would notice the long stretches of road that are lined with lots of tall thin pine trees in perfectly straight rows (these are the pines that were planted!). Once I learned this, I new immediately this had to be the one. Rob was always talking about how much he loved those pines and how perfectly they lined up whenever we would see them along the roadside.

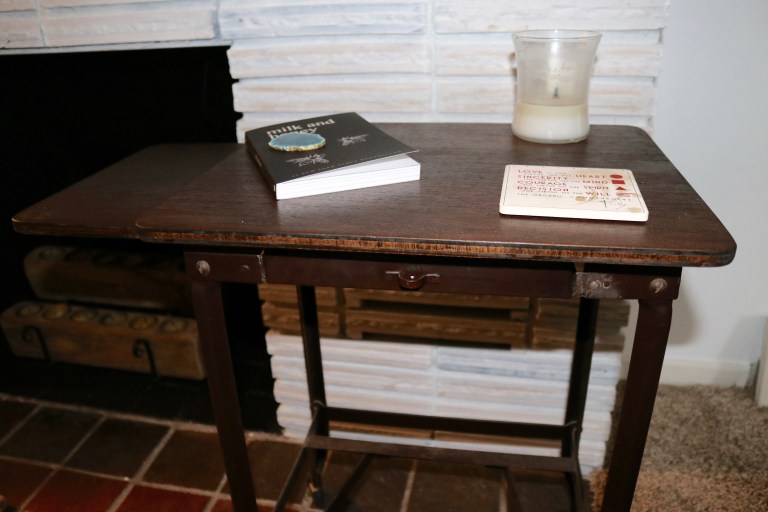
Finding our mid-century modern writing desk was the perfect addition to the space. I love that it has wheels and can be used as a side table everyday and a portable desk when needed.
When I find something I really like, I try to think of a spot for it to go in the room. If I can’t think about a good spot for it I won’t buy it. I think of the other items already in place along with the colors and textures. I use this method to refrain from buying everything cute on the planet. 🙂 Sometimes this doesn’t always work. If all else fails, I keep my receipts for those moments when I get home and the item does NOT work like I imagined.

This has happened a couple of times. There have been items that Rob and I crack up about when we see how terrible it looks, then I return the item with no shame in my game. Not every item is a magical moment of clarity. Sometimes it takes a few awful items to finally land on the perfect one!
I love up-cycling pieces and giving them new uses. We were kindly given this bookshelf when we first bought the house. I was clueless as to where it would belong, until I became increasingly annoyed with our wall A/C unit.
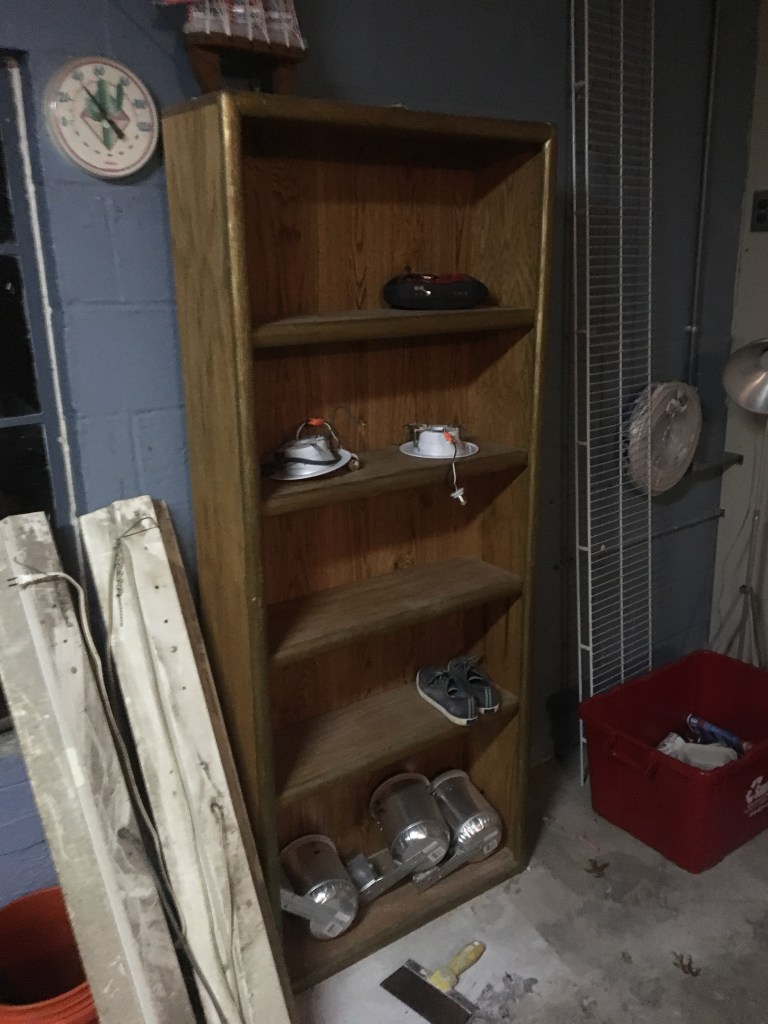

After some Pinterest research and consulting with my very own Bob the Builder 😉 we decided to cut the back of the bookshelf to sit against the A/C unit and mask it as much as possible. I painted it and immediately fell in love with the concept. In the cold temperatures we bring out the insulated A/C cover and with some careful placement the unit is unrecognizable. I definitely recommend doing this if you have a wall unit. In summer, we take away the large items and the cover and the items surrounding it at least distract a little from the large eyesore in the corner of the room.
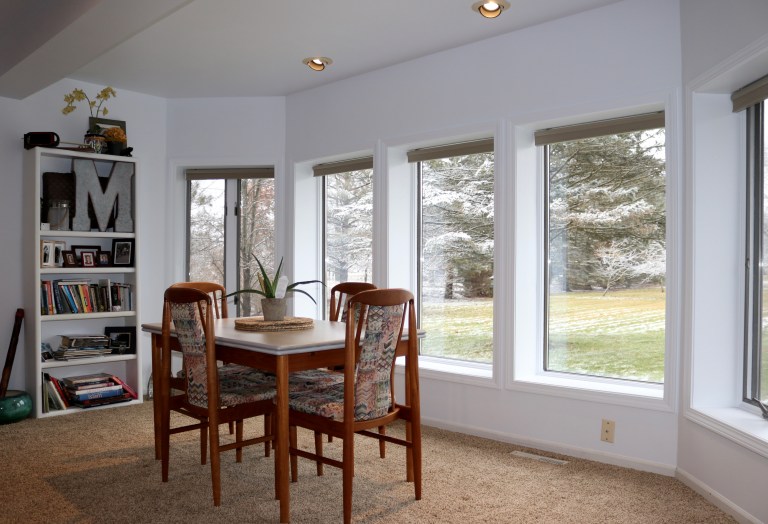
We were blessed with Rob’s grandparents’ mid-century modern dining set and of course I damaged the top of it while trying to freshen up the teak. 😦 After wallowing in self-pity for a few days, I finally decided I had to paint the top. The end result is much better than we anticipated. Just do me a favor and DO NOT look up the original version of this table and how much they are going for…FAIL [face palm].
…such is life…
I hope you enjoyed this long [well overdue] update. I think my winter project this year will be tearing up the beige carpet and re-finishing the original 1950 oak floors and replacing all of the switches/switch covers to white ones. I can’t wait for that transformation!!!
Love,
This first time living room decorator